
Collecting waivers on Village

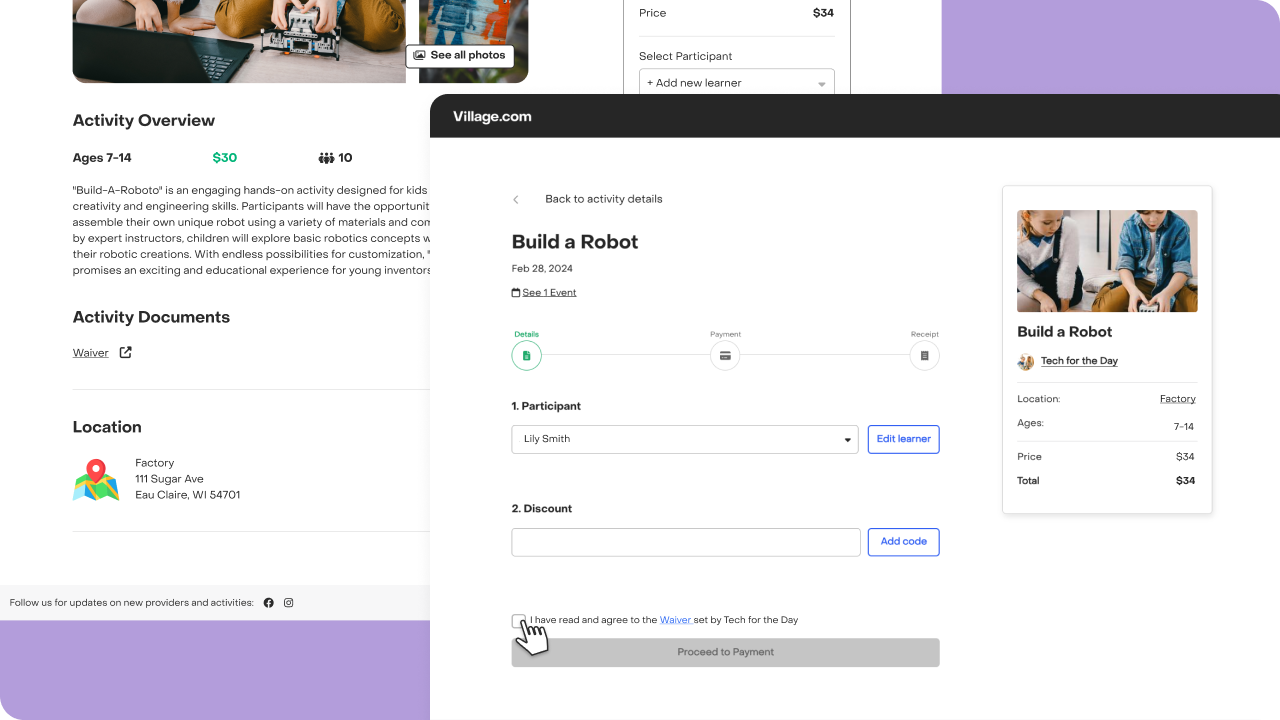
On Village, you can easily collect waiver opt-ins on your sign-up page. Upload relevant documents and waivers that families need to review and agree to before signing up, such as privacy policies, terms of use, and conduct guides.
These documents will be visible for families on your activity page, positioned under the activity description, and also during the registration process before payment.
How to add a Waiver or Document
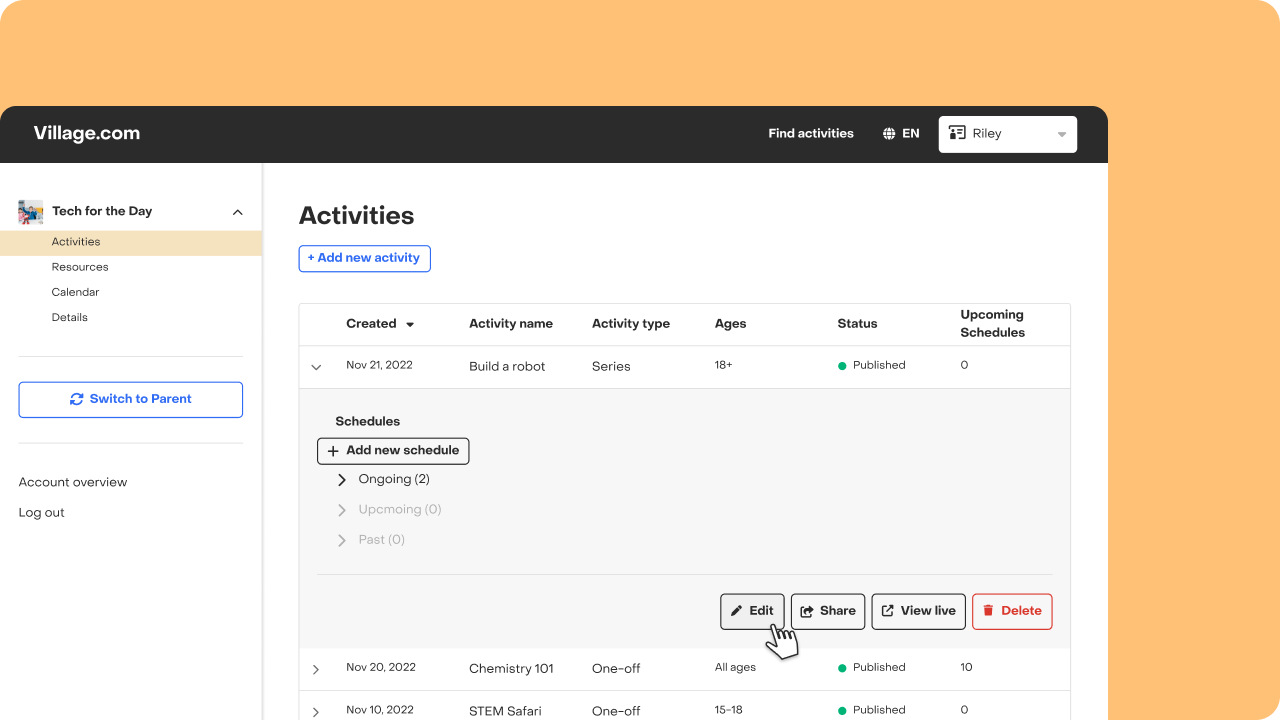
- Locate your activity in the Activity tab.
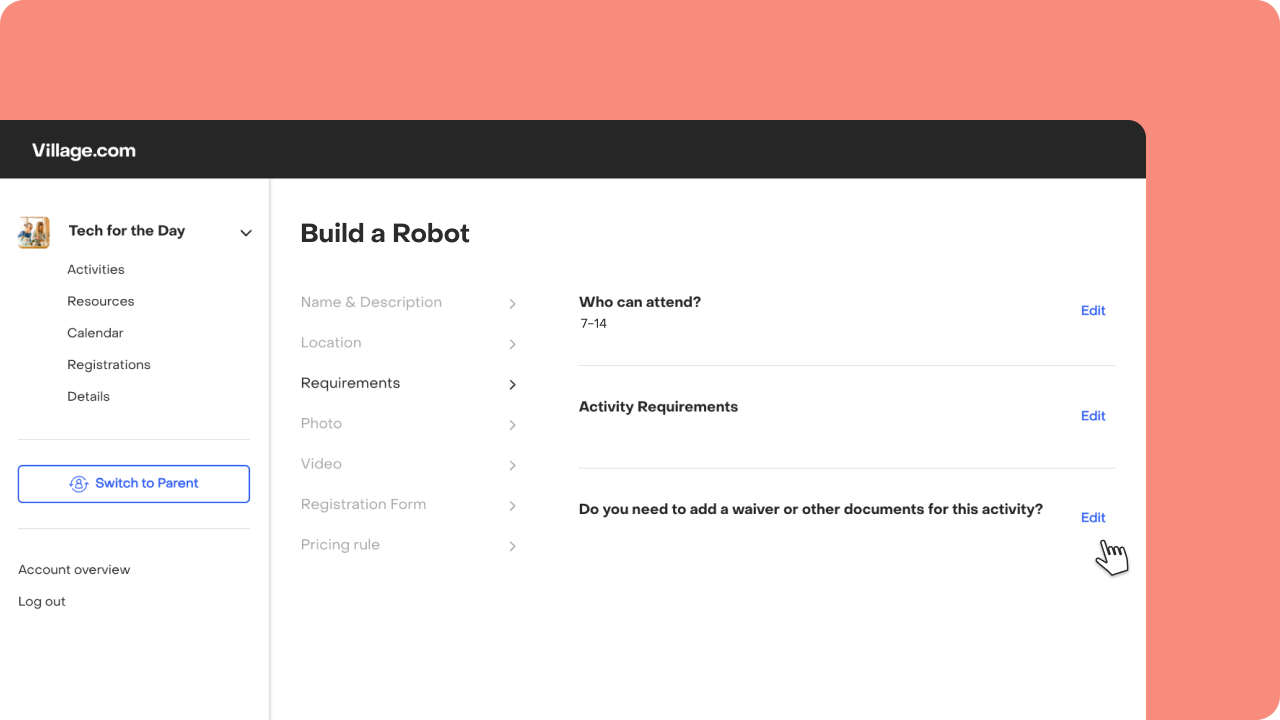
- Open details and tap the "Edit" button.
- Navigate to the “Requirements” Tab.
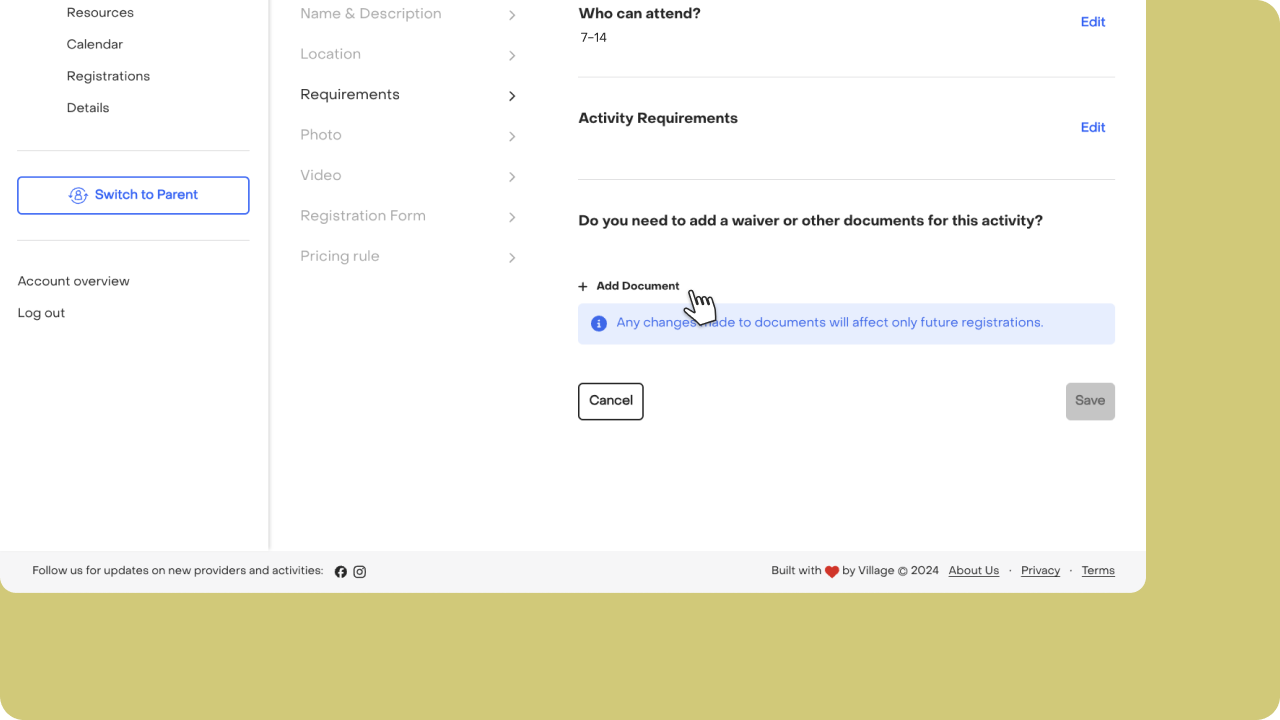
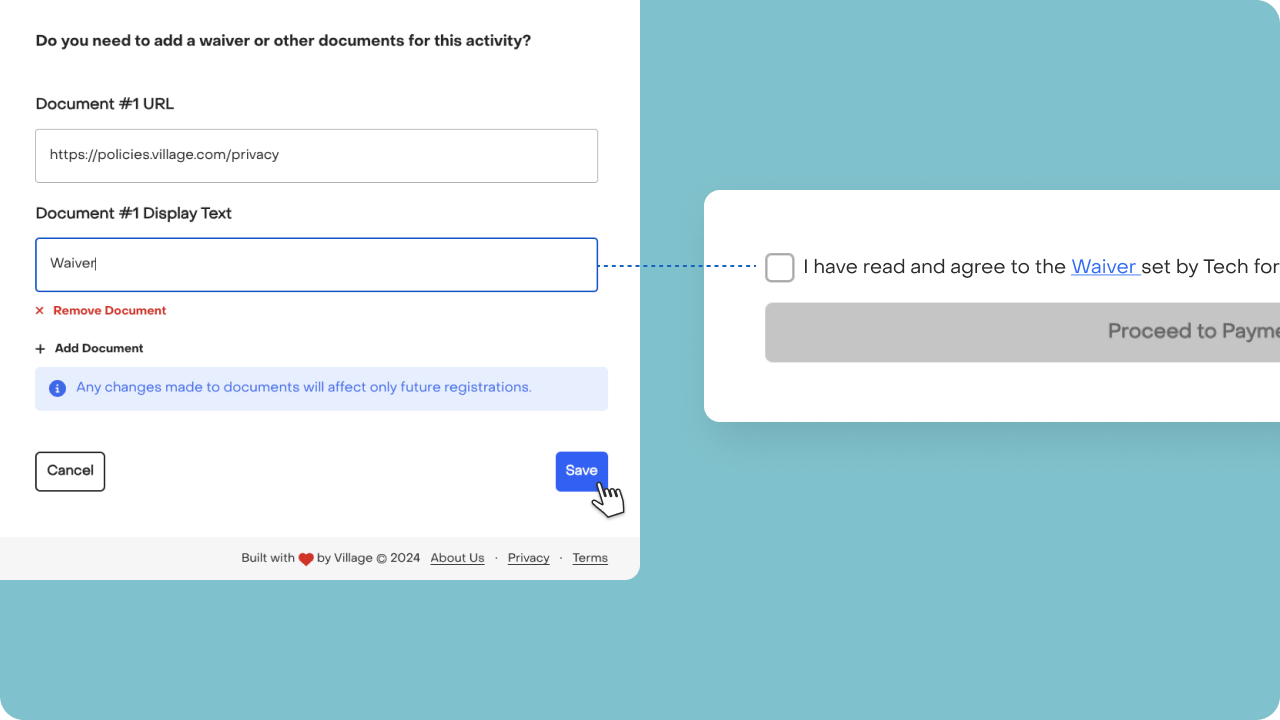
- Add document: Locate the section titled “Do you need to add a waiver or other documents for this activity?” and tap “Add document.”
- Paste document URL: In the “Document #1 URL” field, paste the URL where your document is hosted. If you don't have that waiver online already, you can host it via Google Drive for free following these steps.
- Enter display text:In the “Document #1 Display Text” field, enter the text that families will click on to access the document. We advise making the display text say "Waiver."
Manage your documents: remove or edit waivers.
You can add as many documents as necessary and remove them individually by tapping the “Remove document” button.
It's important to note that if you have registrations on any ongoing or past schedule, certain limitations apply. While you can't edit or delete existing documents, you do have the option to add more documents. However, please be aware that any additional documents will only impact future registrations. This ensures that your changes won't affect participants who have already signed up for ongoing or past schedules, maintaining the integrity of their initial agreement.
If you have any questions or need further assistance, feel free to reach out to us at hello@village.com.

