
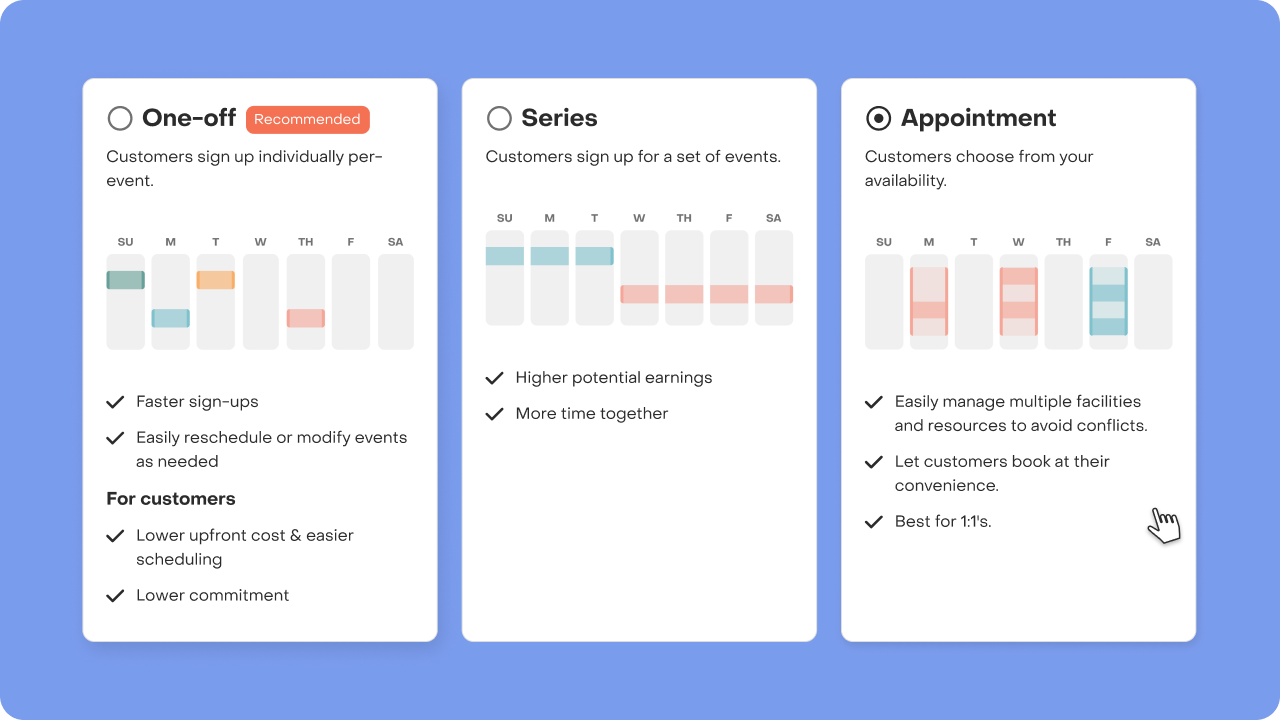
Appointment usage guide

This guide will walk you through the process of creating and managing Appointments on Village, designed to simplify 1:1 private sessions and facility rentals. Let's get started!
Creating an Appointment Activity
Creating Appointments is a breeze. Simply click "Create activity," select Appointment as the activity type, and follow the familiar process.
Remember, once published, activity types can't be changed.
Scheduling an Appointment
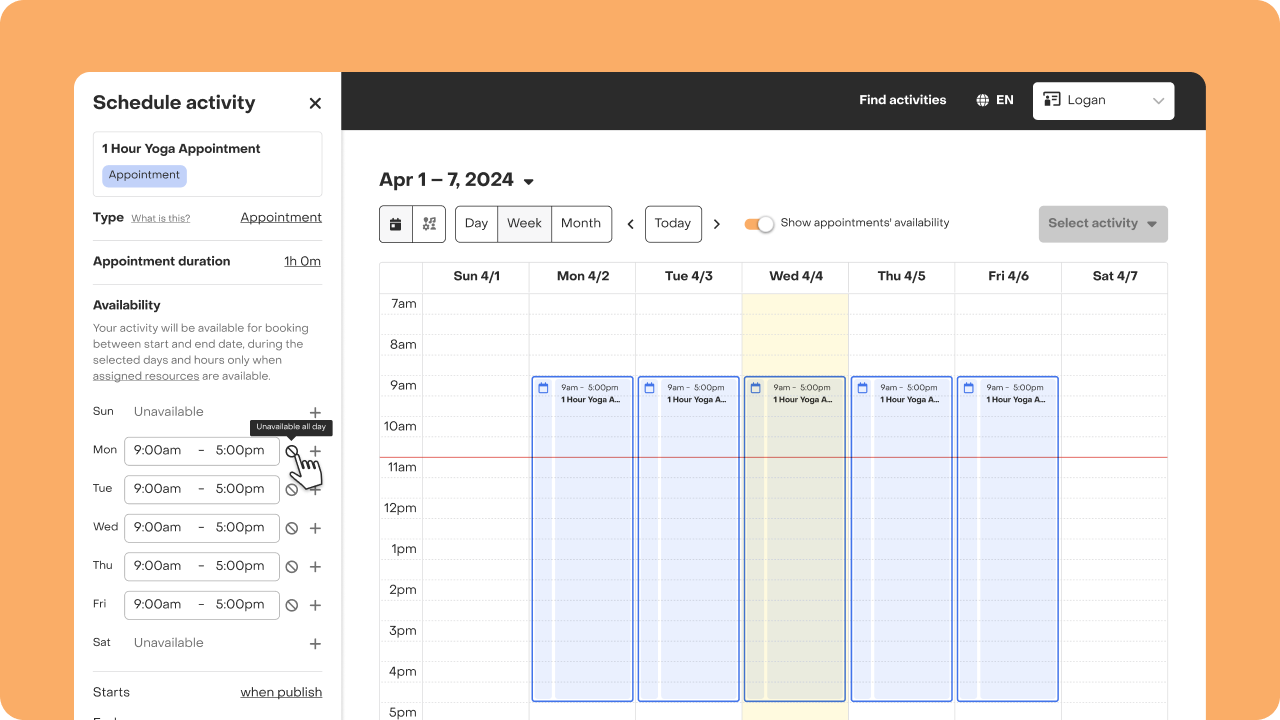
Instead of locking in specific dates and times, your Appointment activities will be available weekly within a designated time frame.
If it's your first time creating an activity, you'll be directed to the scheduler. Otherwise, navigate to the "Calendar" tab, tap on "Schedule activity" and select the Appointment activity to begin.
Appointment configuration
Let’s go through the process of setting up the Appointment configuration so you can publish and start collecting registrations:
Availability
Define the days and time windows for your activity's availability. Your activity will be available for booking between start and end date, during the selected days and hours only when assigned resources are available.
Start and end date
Set the time frame during which your activity is available for booking.
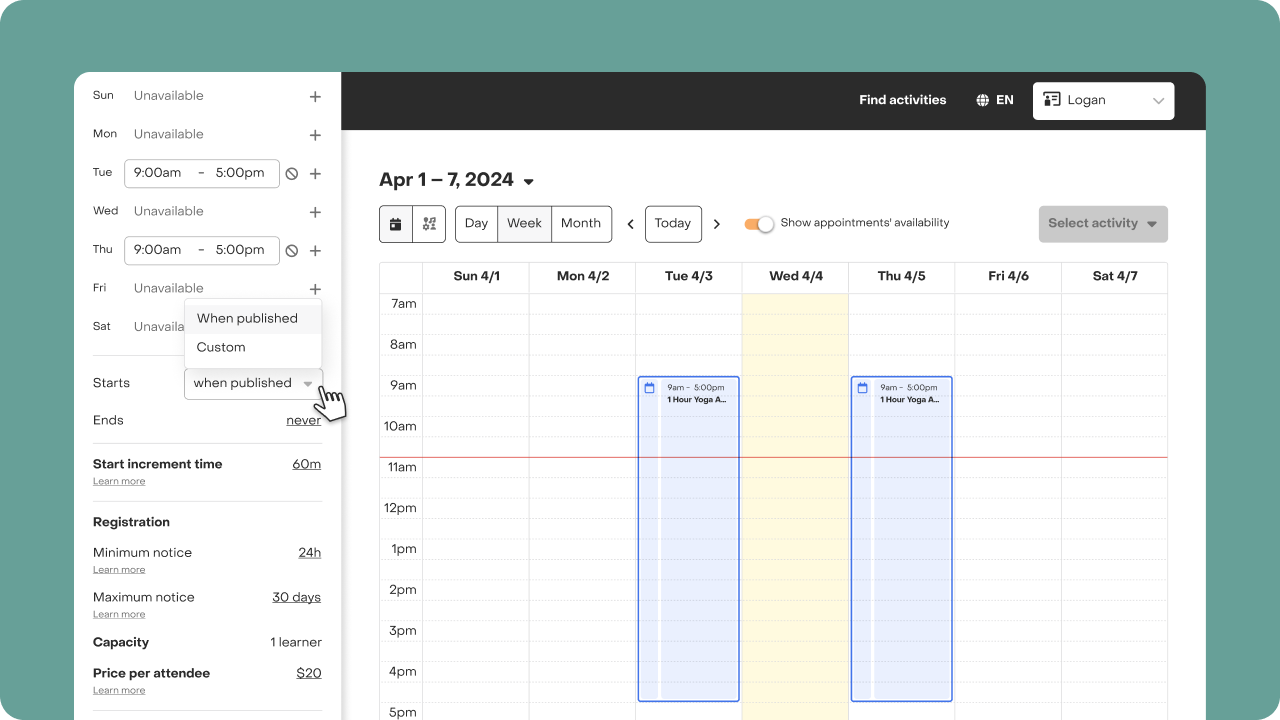
Start increment time
Maximize available time slots by setting the frequency of Appointment start times.
Minimum notice
Specify the minimum lead time required for scheduling Appointments.
Maximum notice
Set the maximum time in advance for scheduling Appointments. Customers will not see Appointments as available past this time.
Assign resources
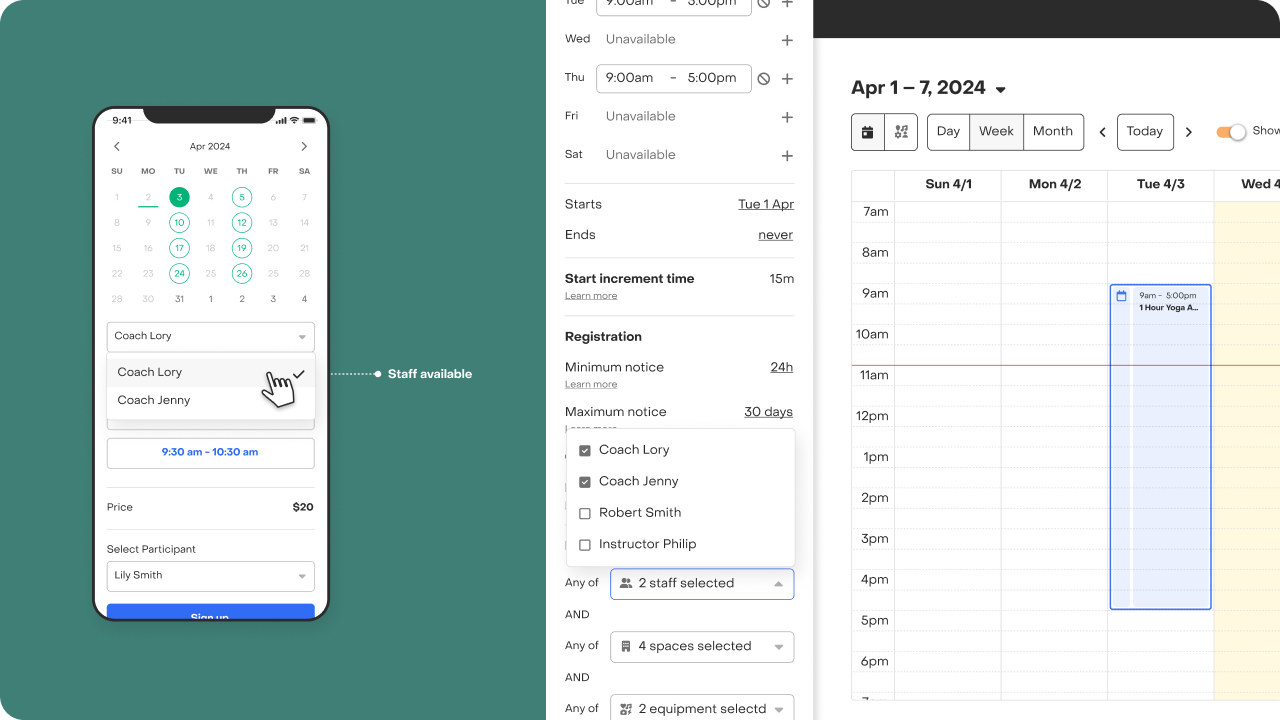
For an Appointment to be scheduled, you'll need to assign at least one resource:
- What is a resource? A resource encompasses all essential staff, spaces and equipment needed to facilitate Appointments. If you don’t handle staff, simply add yourself as a resource to proceed with publishing your Appointments.
- Why are resources useful? Resources play a crucial role in avoiding scheduling conflicts by automatically preventing overlapping bookings.
- How do I add a resource? You can do so directly from the scheduler or through the newly introduced resource tab. Simply provide a name and specify resource availability, and you're all set to go!
Learn more about resources and how to use them.
Capacity and price
Please note that capacity is locked to 1 and cannot be changed. Price set is the price each attendee will pay for attending one Appointment.
Easy to schedule, convenient to book
For customers, booking Appointments is as easy as ever. They can choose staff, select a date and time, and proceed with booking, all while maintaining access to scholarships.
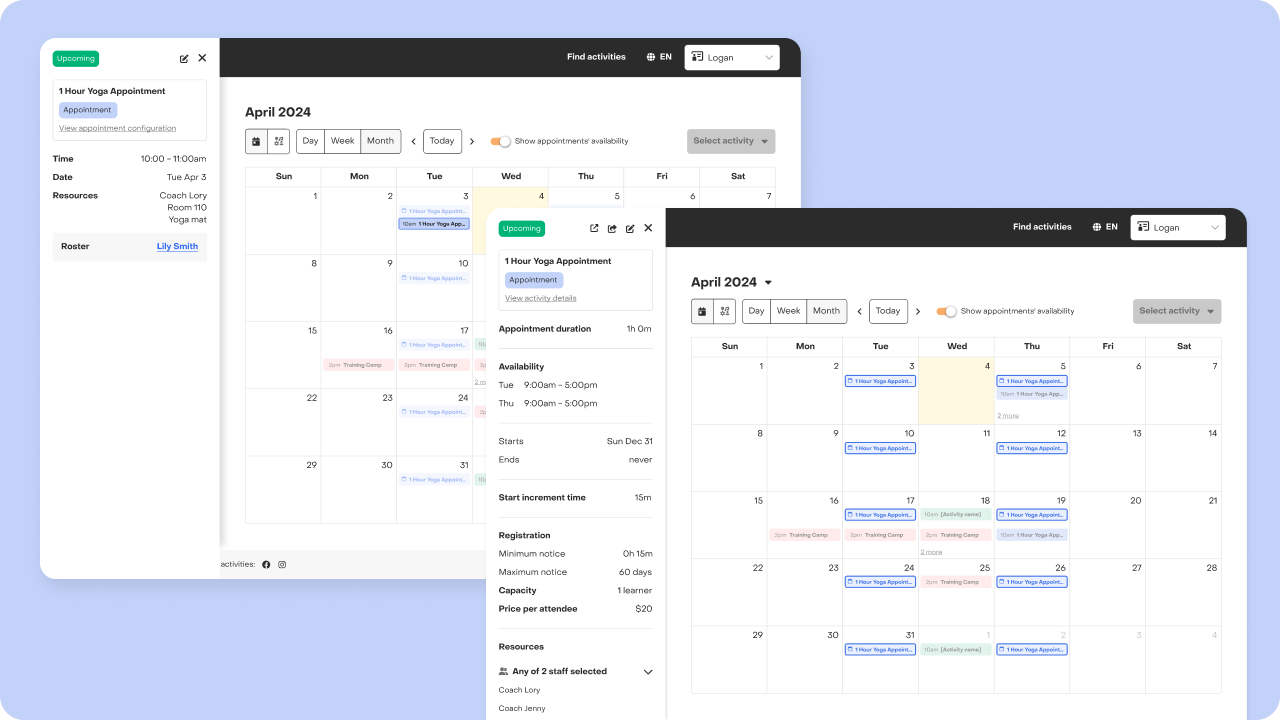
Appointment configuration vs booked appointments
After publishing, you'll see both the Appointment configuration and booked Appointments on the calendar. Booked Appointments represent scheduled sessions by customers.
Your Appointment roster is now of 1 participant. If you are interested in visualizing all participants who have registered to your appointment activity, you can go to the participants tab and filter the table by activity.
End an Appointment
Appointments cannot be deleted but can be ended by changing the end date to the current date. You can restart it by repeating this process and setting an end date in the future.
Edit Appointment
- Navigate to the “Calendar” tab.
- Select the Appointment configuration.
- Tap edit icon.
⚠️ Please note that modifications made to Appointment settings will only apply to future registrations. If customers have already booked Appointments based on previous rules, such as different staff or end dates, any conflicts will need to be managed manually.
That's it! You're now equipped to create and manage Appointments effortlessly. Should you have any questions, our support team is here to help.

