
Schedule activity step-by-step

So, you've got an awesome activity on Village, and now you're ready to add schedules and start collecting sign-ups! Let's walk through the process step-by-step. Are you interested in scheduling appointments? This article will suit you best.
💡Not sure what if you should add a schedule or create a new activity? Check this article.
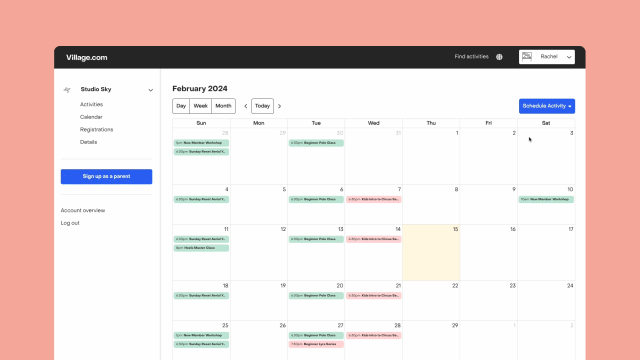
Adding a schedule on 3 clicks
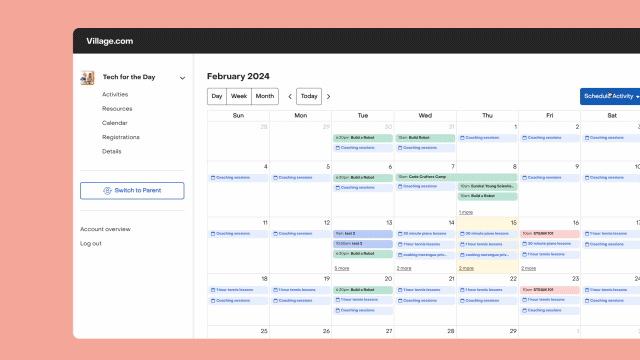
- Navigate to the “Calendar” tab.
- Tap on the “Schedule activity” button.
- Choose the activity you want to schedule from the list and voila!
Ta-da! If you've scheduled this activity before, your duration, capacity, and price settings will be saved from the last time you offered it. But don't worry—you can still make changes as needed.
Pssst... Don't forget to hit publish when you're done!
Schedule activity: guide and tips
Let's dive into each part of the scheduling form, with some tips we've gathered from watching over 100 providers go through this process:
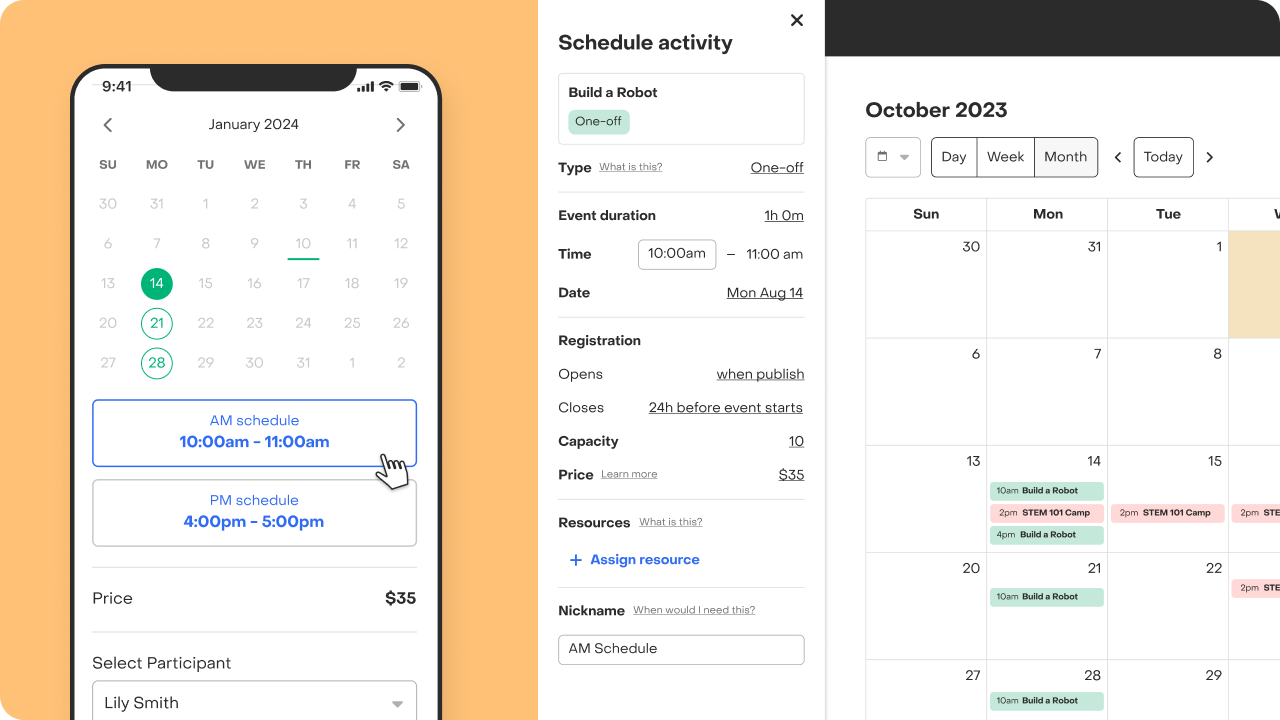
Duration
Choose a duration that suits your audience. Shorter sessions may work better for younger children, while older participants might prefer longer, immersive experiences. Set a realistic duration considering time for introductions, breaks, snacks and clean-up.
Add availability for One-off
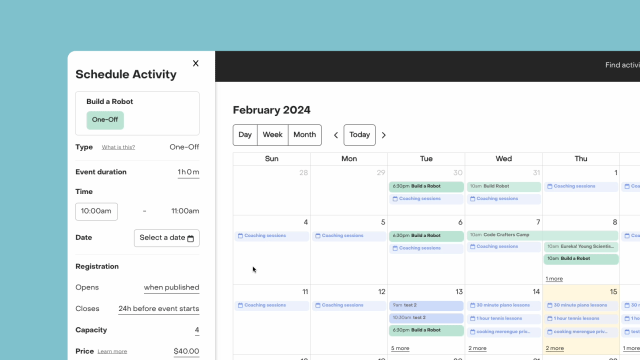
For one-off events, customers register for a single event. After setting the event duration and time, choose a specific date for your activity to take place. You can set up multiple schedules for one-offs, but each date needs to be selected individually.

Before selecting a date, you might want to read this article about when to schedule your activity
Add availability for Series
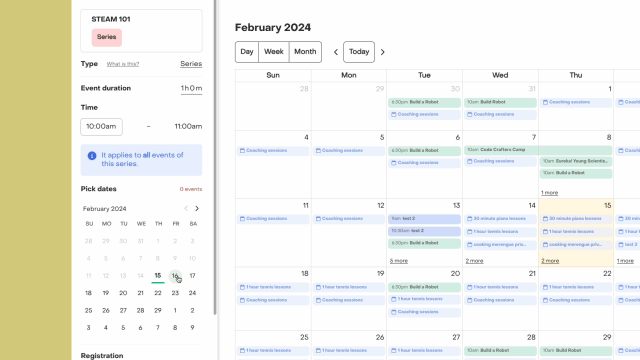
For series events, customers register for multiple events. The duration and time apply to all events in the series.
If it's your first time scheduling a series, pick as many events as you want. However, for rescheduling, the number of events is fixed and can't be edited.
Registration open and close dates
Choose when registration opens and closes. Give yourself enough time to promote and enhance your activity by setting an opening date in advance.
For the closing date, decide whether registration ends when the event starts, 24 hours before, or on a custom day (before the first event starts). Would you like to collect registration after the event has started? Please write a request to hello@village.com
Capacity
Set a class size that balances space and engagement. Ensure it's large enough to accommodate participants but small enough for personalized interaction. It's better to err on the side of smaller class sizes to enhance engagement.
Price
Define a price per attendee. Village will suggest a pricing based on the average pricing offered on the marketplace, but you can modify it based on your one experience. Price should fit the local market in terms of cost per minute and incorporate any materials costs in intro classes.
You can also dynamically adjust it based on registration questions at the activity level to offer customers even more possibilities.
Take into consideration that the pricing set for series events is the total amount charged to attend ALL the series. You can add a payment plan at the activity level to offer customers even more possibilities.
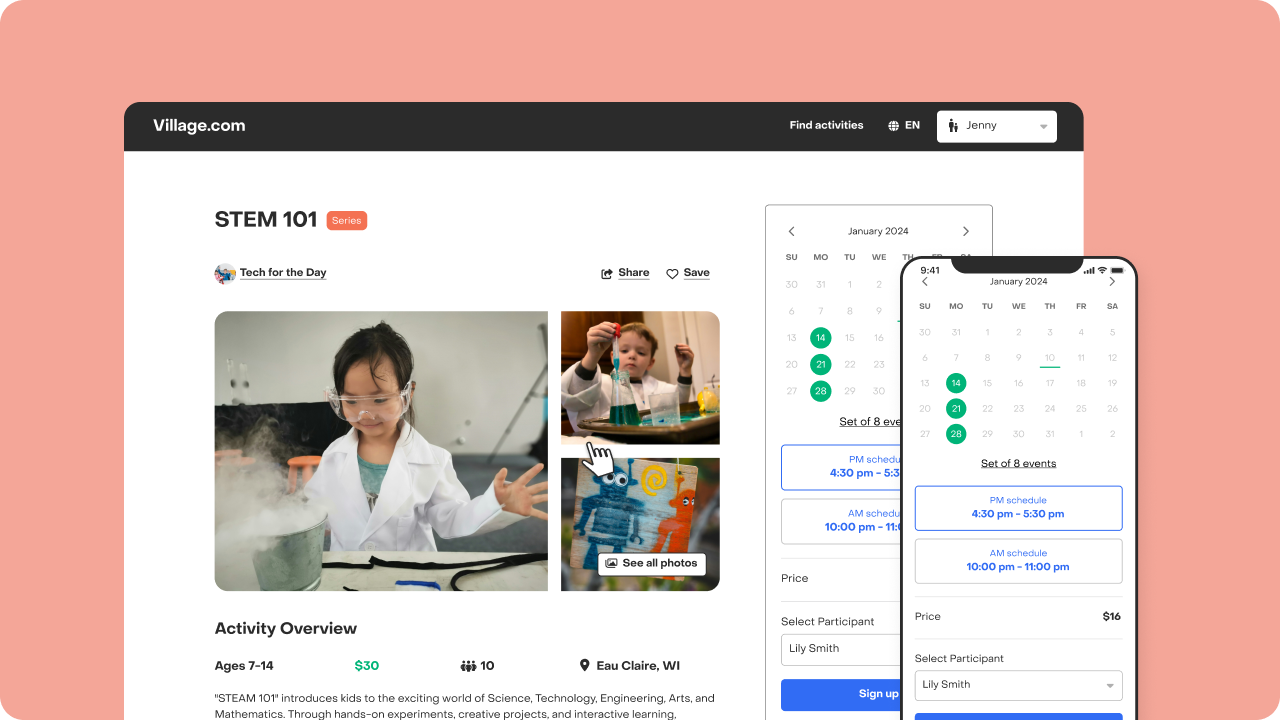
Nickname
Schedule nickname is a short title customers see next to this specific event/set of events. If you have slight variations between offerings such as instructors or classrooms, using the Schedule Nickname field can help communicate that information to customers.
Once you've filled out all the details, hit publish and start collecting sign-ups! With these simple steps, you're all set to organize and optimize your activity schedules.
Still have questions or want to provide feedback to improve the scheduling experience? Feel free to reach out to us. We're here to help!

