
Edit activity

Just published your activity but want to make some tweaks? No worries! You can edit it anytime to make sure it's just right and take full advantage of what Village has to offer!
How to edit my activity
- Locate your activity in the "Activities" tab.
- Click the “More Options” menu (⋮) on the activity row and click "Edit".
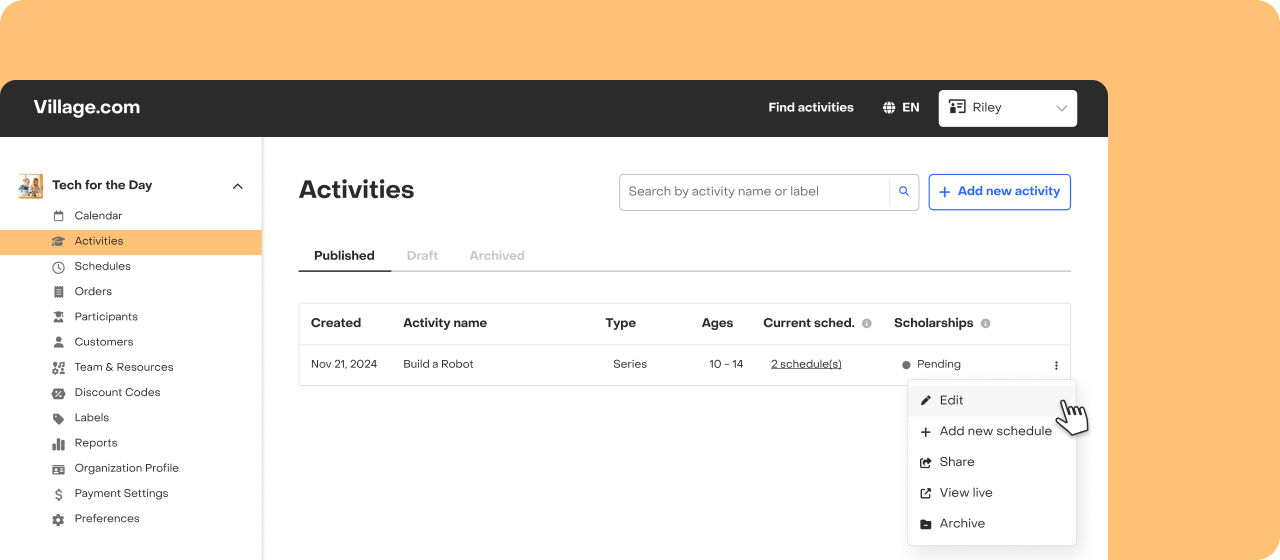
Explore the list under the activity name to find the items you want to edit:
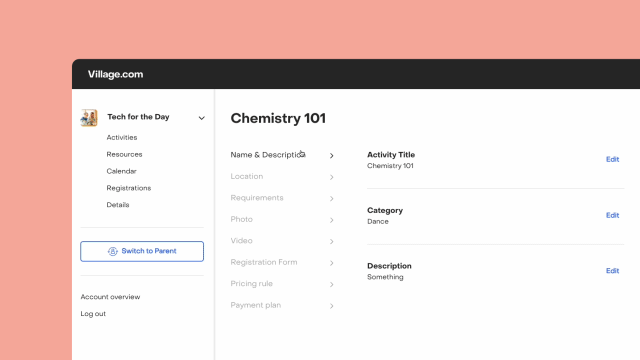
Basic settings
Activity Title, Category and Description
Navigate to the “Name & Description” tab. Locate the section you wish to edit and tap the “Edit” button on the right. Remember to save once you have made the necessary changes!
Location
Go to the “Location” tab. Tap the “Edit” button to open the location form.
Age range
Navigate to the “Requirement” tab. Locate the “Who can attend?” section and tap the “Edit” button on the right and adjust the age range using the slider.
Visibility
If you prefer to keep your activity hidden from Village’s marketplace, follow these steps.
Photo
Go to the “Photo” tab. Follow these instructions to add, remove and re-order your activity photos.
Advanced Settings
Activity requirements
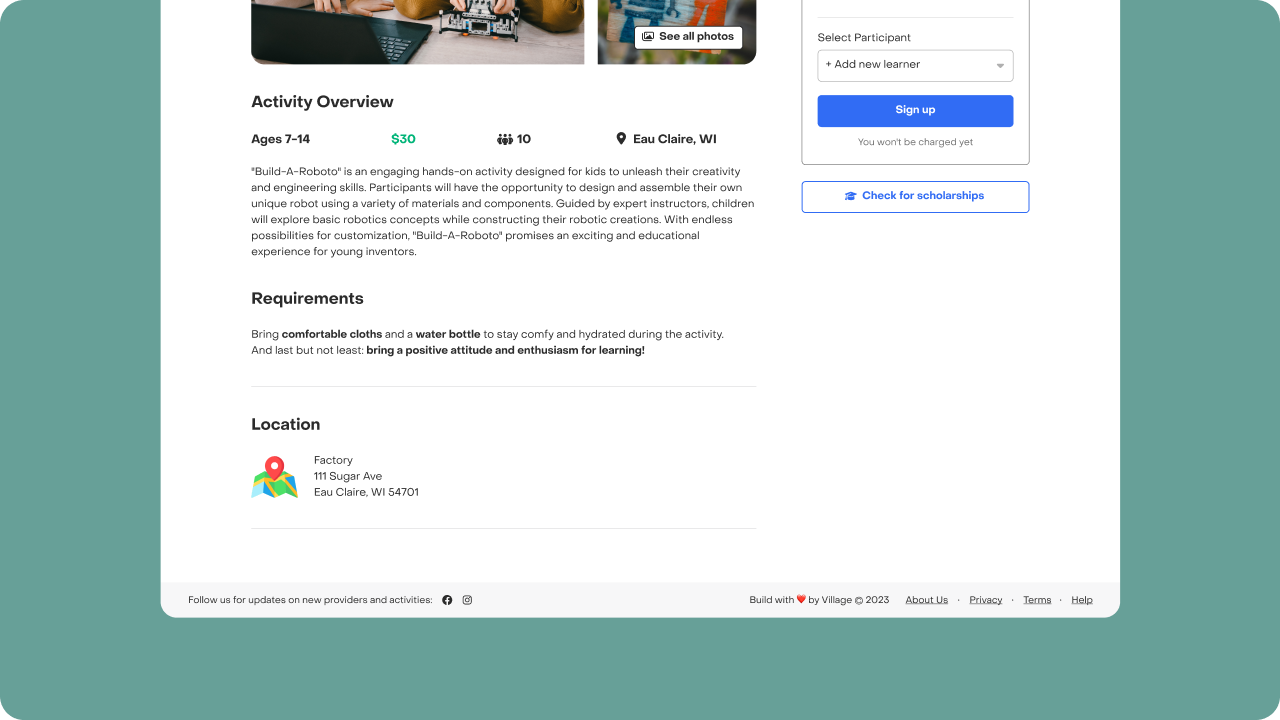
Navigate to the “Requirements” tab and locate the “Activity requirements” section. Tap “edit” to include details such as necessary supplies for participants or any required safety precautions.
These requirements will be showcased on your activity's public page, positioned directly below the description. Please note, you have a limit of 500 characters to outline these requirements, thus it's advisable to be concise and clear.
It's important to note that if you have registrations on any ongoing or past schedule, you will not be able to edit your requirements.

Label
Navigate to the “Label” tab to assign a label to your activity. Assigning a label to your activity will help you organize and subcategorize it. This allows you to visualize your revenue and other reports grouped by label, and enables customers to filter your offerings on your provider page. This article will walk you through the essentials of creating, assigning, and managing activity labels.
Waivers and documents
Go to the “Requirements” tab and locate the section titled “Do you need to add a waiver or other documents for this activity?” Here, you can upload relevant documents and waivers that customers need to review and agree to before signing up. Learn more about waivers and documents.
Video
Navigate to the “Video” tab. Tap “Upload from device” or drag and drop a video file smaller than 5GB from your device.
Registration form
If you require specific information about the participants attending your activity, you can add questions for them to answer during the registration process. Read full guidelines here.
Pricing rule
To implement variable pricing based on participant responses during registration, you can utilize the pricing rule feature. Learn how to use this advanced feature.
Payment plan
If your activity is a series, you can offer customers a convenient payment plan to manage their installments easily. Check out our guide to learn more about setting up a payment plan.
Cancelation policy
When it comes to cancelations, some activities may benefit from offering customers more flexibility, while others may require stricter protection. In Village, you have the ability to customize the cancelation and refund policy for each of your activities. This article will guide you through the process.
That's it! You're all set to make your activity even better! If you have any questions or need further assistance, feel free to reach out to us.

